
The Job a TXV Does on an Air Conditioner and the Leak It Mimics
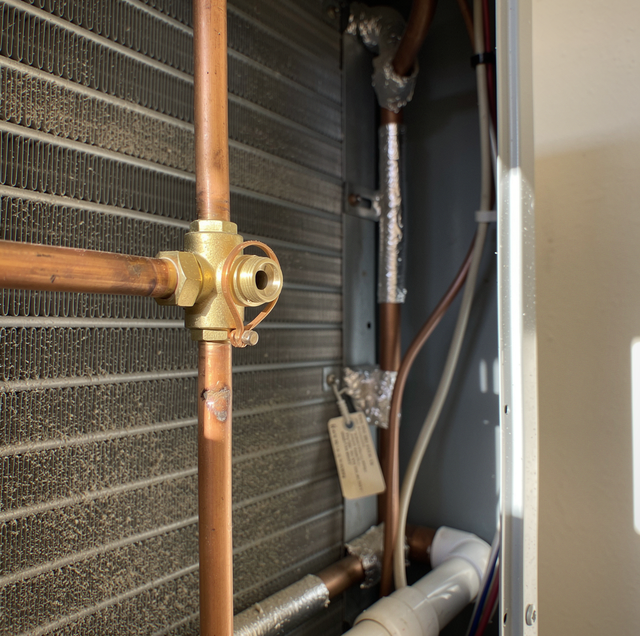
Either your air conditioner is low on refrigerant, or something in the line is throttling the flow to the coil, and the invoice on your counter cannot distinguish between the two. It says what it said the last time: refrigerant added, cooling restored. The pressure the technician applied to the suction line was low both times because a system that has lost charge and a system whose metering valve has stopped opening far enough starve the same coil in the same way. One of those gets repaired by finding a hole. The other gets repaired by opening the valve body, and every ounce added to it, meanwhile, makes your compressor work harder. The part sitting in the middle of that fork is a thermostatic expansion valve.
Holding a Target Superheat at the Evaporator Outlet
The valve sits at the inlet of your indoor coil, on the boundary between the high-pressure liquid line and the low-pressure evaporator behind it. Liquid arrives warm and under pressure. It leaves through a small port at a pressure low enough to boil, which is how the coil removes heat from your house.
How much goes through that port varies with conditions. Feed too little and the refrigerant finishes boiling early, leaving the last stretch of coil idle. Feed too much and liquid reaches the end of the coil and heads down the suction line toward a compressor built for vapor.
The valve holds a balance between three pressures. Pressure inside the sensing bulb pushes the diaphragm one way. Evaporator pressure fed back through the equalizer pushes against it, and so does a spring. Those three are labeled P1, P2, and P3 in that order, and in operation P1 equals P2 plus P3.
Superheat is the quantity that the balance protects. It is the difference between the refrigerant vapor temperature and its saturation temperature, and a valve that holds that difference within a narrow band keeps liquid out of your suction line.
Why Does a Stuck TXV Look Like a Refrigerant Leak?
A valve that has stopped opening far enough starves the coil, and so does a system that has lost part of its charge. Either way, less refrigerant boils in your evaporator than the coil was built around. Suction pressure drops. Superheat climbs because the small amount entering boils off early, and the rest of the coil warms the vapor. Capacity falls, so your house stops keeping up through the hottest hours.
The low-side picture on its own points at nothing in particular. A low suction pressure looks like a leak to a homeowner and to a technician working at speed, because a leak comes with a familiar repair attached. The other possibility is a component holding back liquid in a system that still holds every ounce of its charge, and nothing on the low side separates that from a shortage.
Superheat and Subcooling Each Start as a Subtraction
The bulletin gives the pressure-temperature method for superheat. A technician takes the suction pressure at the sensing bulb, converts it to a saturation temperature, and subtracts that from the vapor temperature at the same spot. On an R-410A system, 130 psig on the suction side corresponds to roughly 45 degrees Fahrenheit. Your suction line measuring 57 degrees at the bulb gives 57 minus 45, or 12 degrees of superheat.
Subcooling is the same arithmetic at the far end of the machine: saturated liquid temperature minus liquid line temperature. Take 340 psig at your liquid service port (about 105 degrees), a liquid line at 95 degrees, and a subcooling of 10 degrees.
Neither figure travels. Charge is checked by a metering device: fixed orifice systems by superheat; TXV systems by subcooling. The target subcooling is written per model and per condition, and the ASXS6 table is banded by outdoor temperature, below 65 degrees, 65 to 105, and above 105. A superheat target copied off a piston system says nothing about your system.
Ask for the subcooling figure and outdoor temperature it was taken at, written on the service ticket. Next summer's reading is not comparable without the conditions beside it.
Which One Is Starving the Coil?
Both faults show a low suction pressure and a high superheat. They part company at the liquid line. On an undercharged system, there is not enough refrigerant to fill the condenser, so liquid leaves before it has given up much heat, and subcooling is near zero. An undercharged system will also have low subcooling, and vapor bubbles in the liquid line impede the metering device and make the process noisier, which is the hiss you may hear near your air handler. The repair follows in the order the work has to happen: find where the refrigerant went, seal it, then weigh the charge back in.
A restricted valve gives the opposite second number. Liquid arrives and cannot get through the port fast enough, so it backs up in your condenser, and subcooling runs normal to high while the suction side stays low. That combination points to a high-side restriction, at the valve or in front of it. Adding refrigerant there stacks more liquid in a condenser already holding plenty, which raises head pressure rather than restoring flow. An overcharged system tends to have high subcooling, and the higher compressor head pressure and temperature can cause overheating and premature failure. The correction on those units is capped at 8 ounces, an ounce at a time with ten minutes to stabilize.
The Sensing Bulb and the Contact It Depends On
Not every valve fault is inside the valve. The bulb supplying the diaphragm's opening pressure is strapped to the outside of your suction line and senses only what its contact with that pipe allows. Two straps on a clean, straight section hold the bulb where it needs to be.
Locating the bulb in the return air stream without proper insulation causes a specific failure. Air moving across an uninsulated bulb in a warm cabinet is warmer than the vapor inside the line, and the bulb takes its temperature from whichever of the two reaches it. A slipped strap opens the same gap.
A bulb reading warm opens the valve wider than the coil needs, flooding the suction line with liquid the compressor was not built to handle. A bulb whose own charge has leaked out goes the other way and lets the valve close down. The first of those is a mounting repair, and it leaves your own charge alone.
A Second Number Comes Off the Liquid Line
A technician clamps a temperature probe to the liquid line where it leaves the condenser and measures the pressure at the service port beside it, before anything enters your system.
One number comes off your evaporator outlet, and the other off your condenser outlet; together, they rule out what either one alone leaves open. The second gets taken before the first fault is assumed.
Two parts other than the valve port produce the same starved coil, and they get checked in the order the liquid reaches them. Ahead of the valve sits an inlet strainer, and a partially plugged strainer or drier can produce liquid line vapor, starving the valve with nothing wrong inside it. Downstream sits the external equalizer, a small tube running from the suction line back to the underside of the diaphragm, so the valve operates against the evaporator outlet pressure rather than the inlet pressure. A crushed or plugged equalizer feeds the diaphragm a pressure the coil is not actually at, and the valve throttles as though superheat were high.
An equalizer line pinched during an installation can sit there for years, throttling a coil on a system that has never lost a gram of refrigerant.
Frequently Asked Questions
Because the valve holds superheat inside a narrow band across a range of charge, which is its job, superheat stops moving much as refrigerant is added or lost and stops working as a charging indicator on your system. The line is drawn at the metering device: fixed orifice systems get checked by measuring superheat, TXV systems by measuring subcooling. Which number your technician writes down depends on what your indoor coil is made of.
Your indoor coil's rating plate names the factory metering device, and the installation instructions for your outdoor unit name what the matched coil ships with. On a valve, you will also see a thin capillary tube running from a small brass body at the coil inlet to a bulb clamped onto your larger suction line a short distance away. A fixed orifice carries no bulb and no tube. Ask which one your coil has, and ask for the answer on your ticket, because it changes every number that follows.
Some can. Some adjustable valves carry an adjusting stem, where turning counter-clockwise reduces superheat and turning clockwise increases it, and several valve families take a replaceable cartridge, so the body stays brazed into the line while the internal parts come out. A power element that has lost its bulb charge is replaced on those valves without opening the line. Whether your own valve is one of them is a nameplate question, and your technician can check it.
Yes. Ice forms when the coil surface drops below freezing and stays there. A partly restricted valve on a system moving plenty of air across a warm, damp return can hold that surface above freezing while your house never quite catches up, and you may go a whole season without seeing frost on your equipment. Reduced capacity shows up in your runtime before it shows up as ice, so a system you have never seen ice on is still a system to measure at both ends.
Yes. The refrigerant is recovered before the valve body is opened, and your system is pulled into a deep vacuum afterward. Evacuating to 500 microns or less through the suction and liquid service valves comes before the charge goes back in. Your technician then weighs in the factory charge for your matched indoor unit and adds for liquid line length beyond what that factory charge covers, which is why your line set gets measured instead of estimated on paper.
Look at what your tickets record beside the weight, date by date. A leak your technician found and sealed ends the pattern, because your charge stops leaving. If your paperwork shows refrigerant added yearly and no dye injection or electronic detector pass logged against it, nobody has ruled out the other explanation for your low readings, and you may be watching your own full system get topped up one more time next summer.
Book a diagnostic visit — a technician takes the second reading off your own liquid line once the system has run long enough to settle, which is what separates a restricted valve from a low charge. CMB Air serves Tampa and the Tampa Bay area. Call (813) 447-1443.
